How To Make Your Own Parking Block

DIY Blog: Make Your Own Parking Block
Do you want your own parking block at your house without the hassle of prying it up from a parking lot and transporting it .. or the potential trouble from being caught stealing it? In this step-by-step guide .. we’ll walk you through creating your own parking block using the #blockcover by @curbcover.
MATERIALS NEEDED:
- Block Cover .. by Curb Cover: curb-cover.com/products/block-cover
- Block Cover box .. OR .. scrap wood for the end caps and stabilizing sides
- 2 Small Bags of Concrete mix (we use @quikrete)
- Small roll or piece of 3ml – 6ml plastic from the local hardware store
- One 3ft. piece of rebar (purchase at any Home Depot or like store)
- Mixing tools (bucket .. shovel or mixing paddle)
- Water source
Step 1: Prep-Work
- Start by finding an area at least 6ft. x 6ft. to lay out your materials and start your work
- Find an area that is clean .. protected and as dry and warm as possible
Step 2: Creating The Mold
- Option 1: Turn your Block Cover upside down. Cut two pieces of scrap plywood to size and insert them on both ends of the Block Cover inside the box. It will be a tight fit .. but that’s what you want.
- Option 2: Use two small pieces of scrap plywood and a 2x4 to create the mold and stabilize it. Cut two pieces of scrap plywood at least two inches wider and higher than the Block Cover and rest them on both sides. Measure and cut a 2x4 to length for both of the longer sides. Screw the end pieces to the 2x4 supports along the side.
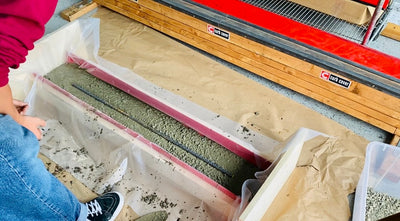
- With either option above .. cut a piece of 3ml-6ml plastic to size and line the inside of the Block Cover with it. Make sure you have enough overlap to ensure it covers once the plastic gets pressed down into the mold by the cement. You can also apply a release agent (optional) to the interior surfaces of the Block Cover as a second option. We prefer the plastic because it protects the interior surface the best so the Block Cover is in perfect shape once we’re done using it as a mold.
Step 3: Mixing & Pouring Concrete
- Follow the instructions provided with your concrete mix to prepare the right amount of concrete (we use two small bags of Quikrete). Use a bucket .. shovel or mixing paddle to thoroughly combine the mix and water according to the instructions.
- Pour the concrete mixture into the mold and fill it half-way.
- Use a rubber mallet or something like it to firmly tap the mold on the side to help the concrete settle and eliminate air bubbles.
- Insert the 3ft. piece of rebar into the center of the block mold. Press it down slightly (this will be oddly satisfying :-) )
- Fill the Block Cover to the top .. and use a shovel or piece of scrap wood to smooth the surface of the concrete .. ensuring it is even and flat.
- Allow the concrete to cure according to the instructions provided with the concrete mix. This typically takes a few days.
Step 5: Finishing Touches
- Once the concrete has fully cured .. turn the mold over and carefully remove the Block Cover from the parking block.
- If desired .. use a rub brick to smooth any rough edges or imperfections on the blocks’ surface. We’ve found the block comes out pretty golden as is!
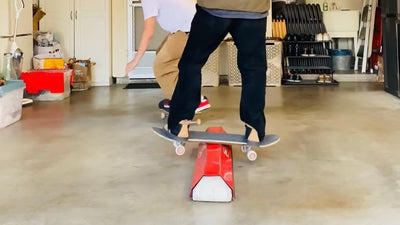
Once you’re done making your first block with your #blockcover .. you’ll have BOTH concrete AND coping in a compact 4ft. skate element for your yard .. garage or basement!
Part of the beauty of the Block Cover is that once you’re done making a block for yourself .. you can make as many blocks as you want for your homies .. or your local DIY spot.
Even if you apply the felt to the inside along with the rubber liner on the bottom to sleeve your parking block or skate it stand-alone .. you can always remove them later to use the Block Cover as a mold time and time again.
So .. get your #blockcover .. and get on with it!
Happy skating!
Luke
Curb-Cover Co-Creator


Leave a comment